Your Development Environment
Here’s what each environment does and why you need it:JTL-Wawi is the ERP itself (the data), Partner Portal is where you
create and manage your apps, JTL Hub is where you install, and ERP
Cloud is where your app runs for the merchant.
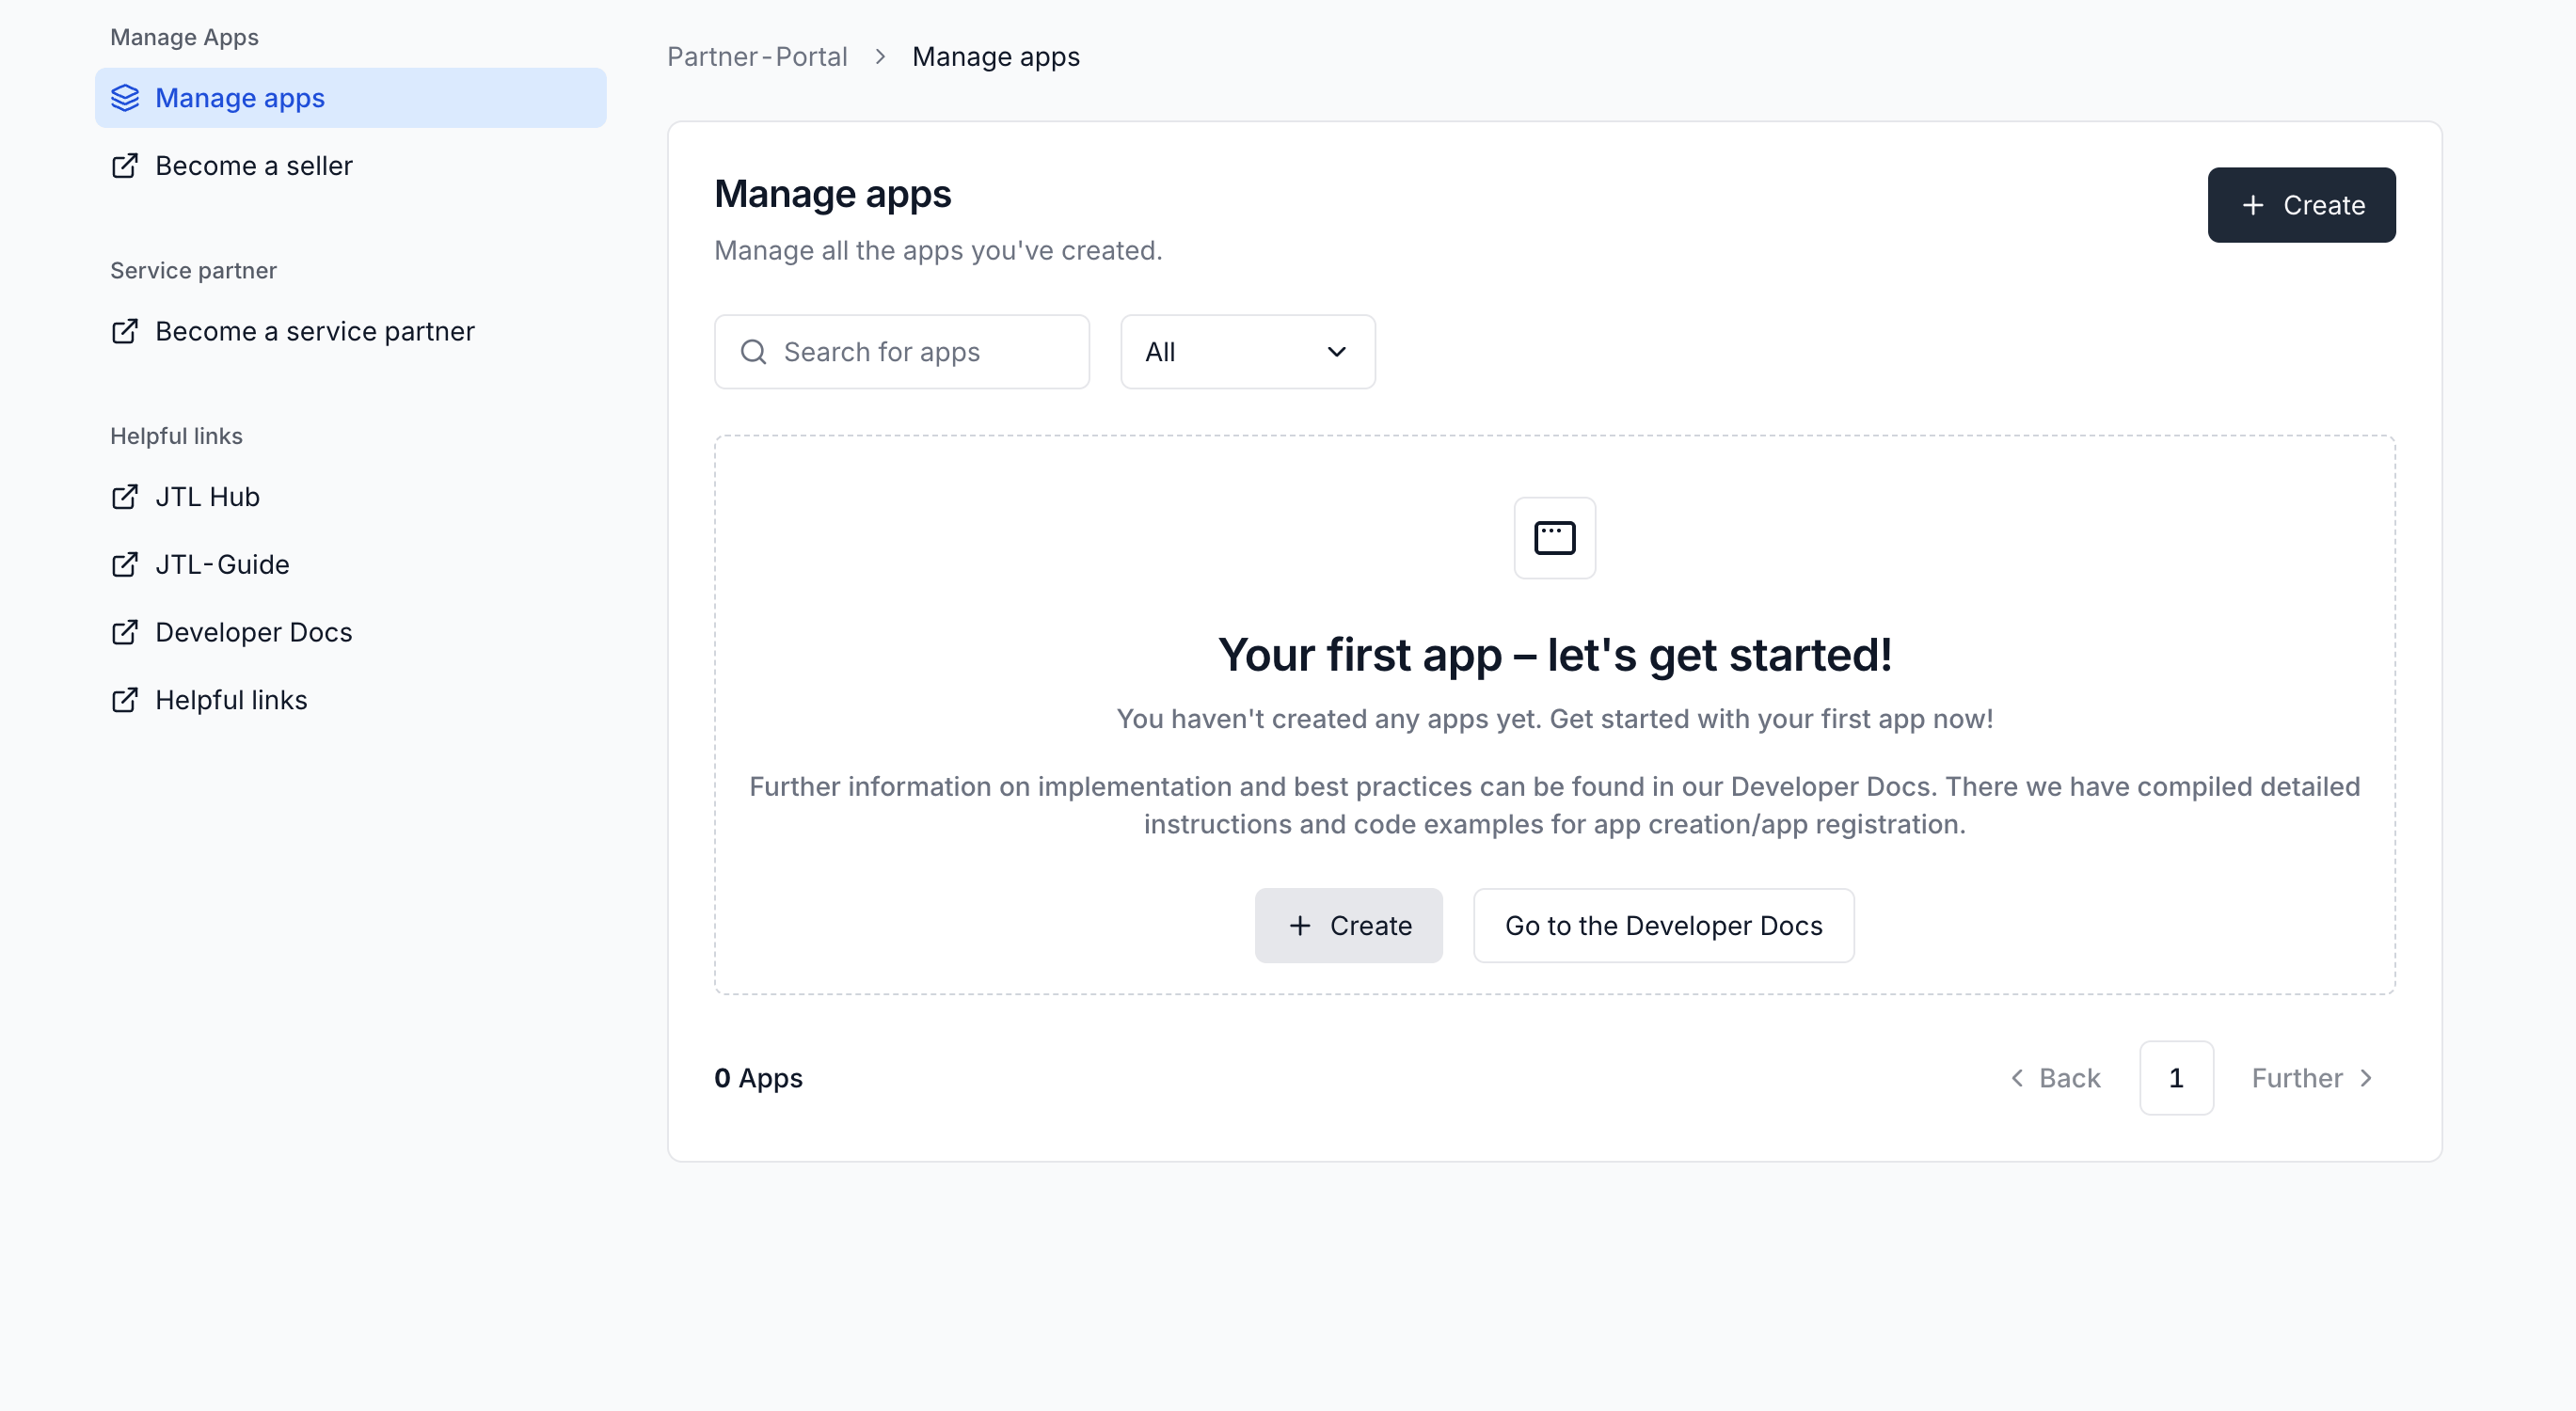
Step 1: Set up your Partner Portal
This is your app management hub where you create apps and get your client credentials.1
Go to the Partner Portal
Open Partner Portal in your browser.
2
Create your JTL ID
Once you navigate to the URL, you’ll be prompted to log in with your JTL ID. Click on the Register now button to create a new JTL ID.JTL ID provides a single access point to all JTL cloud-related services (JTL Hub, Partner Portal, ERP Cloud, etc.)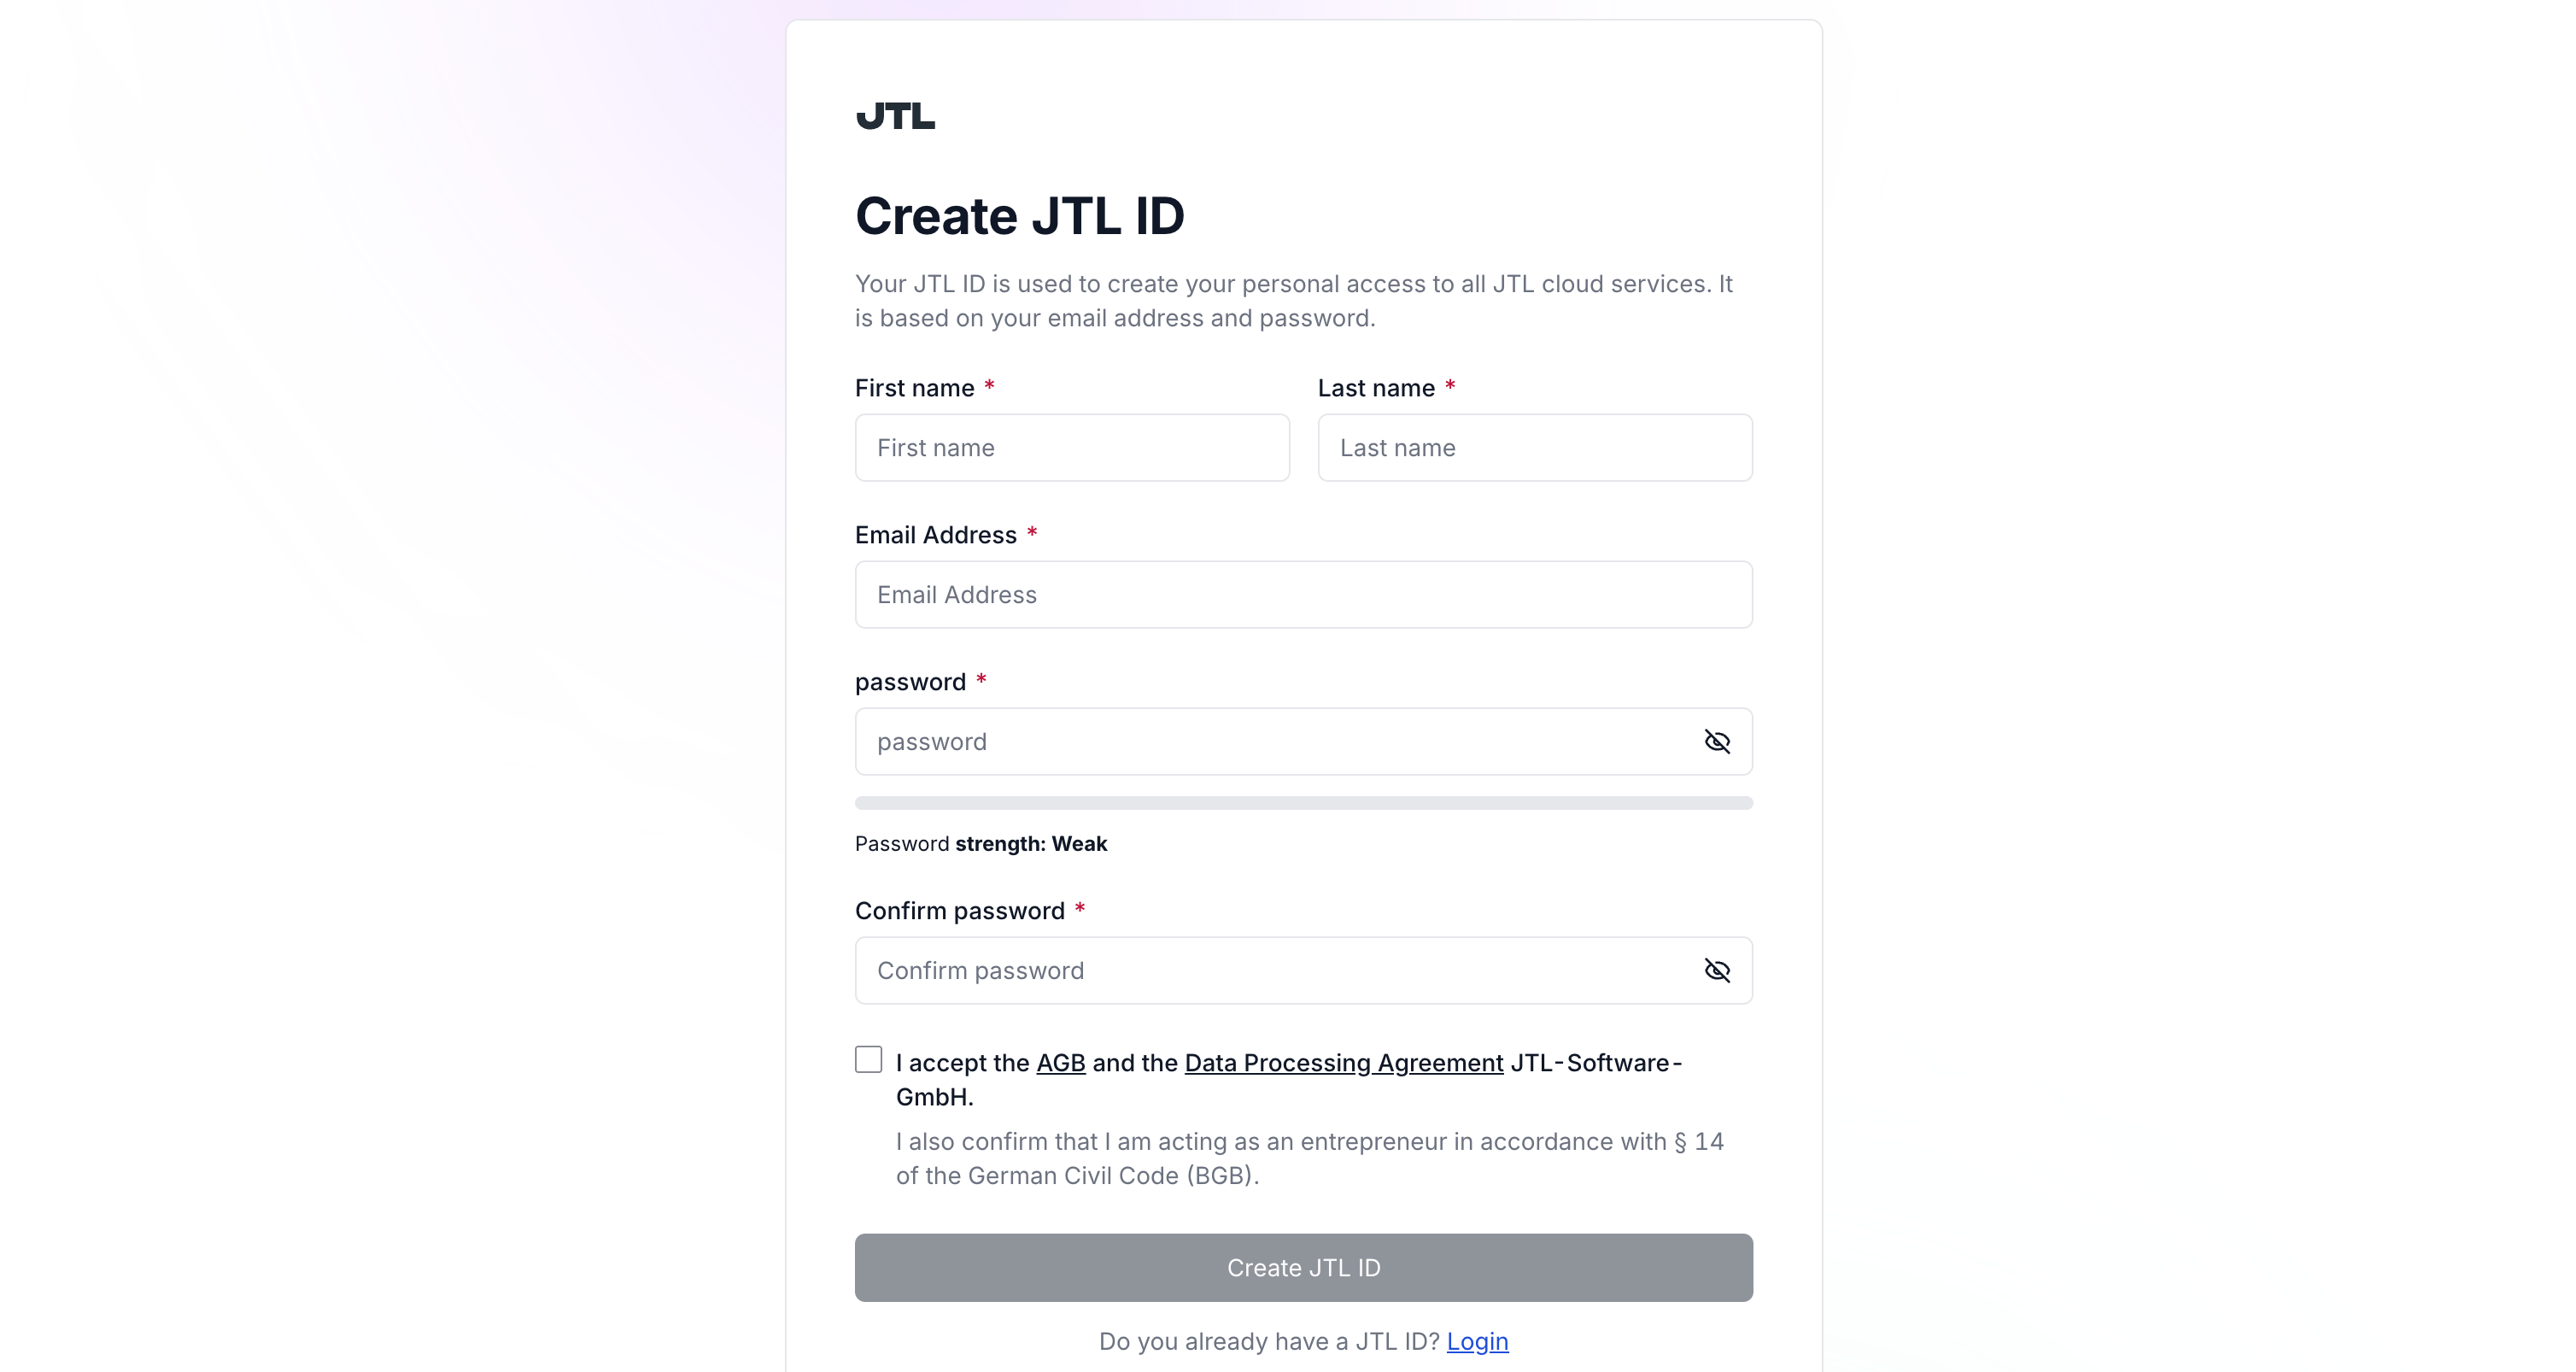
3
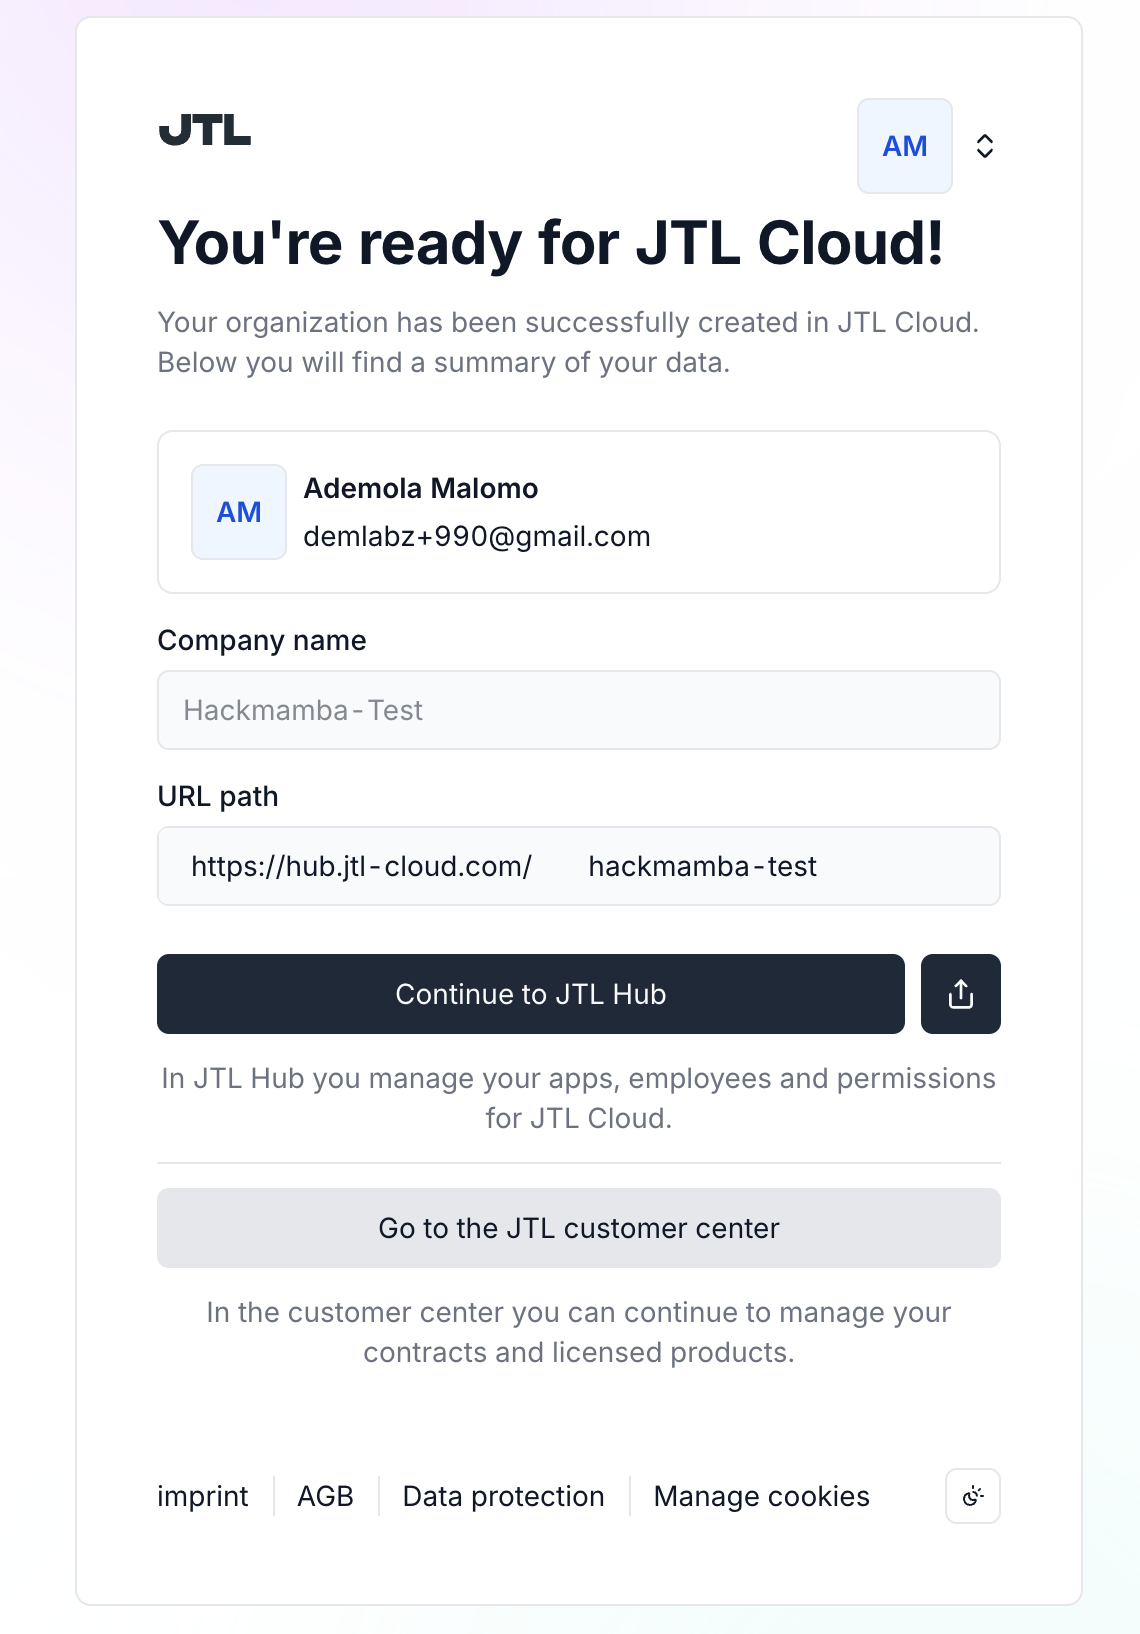
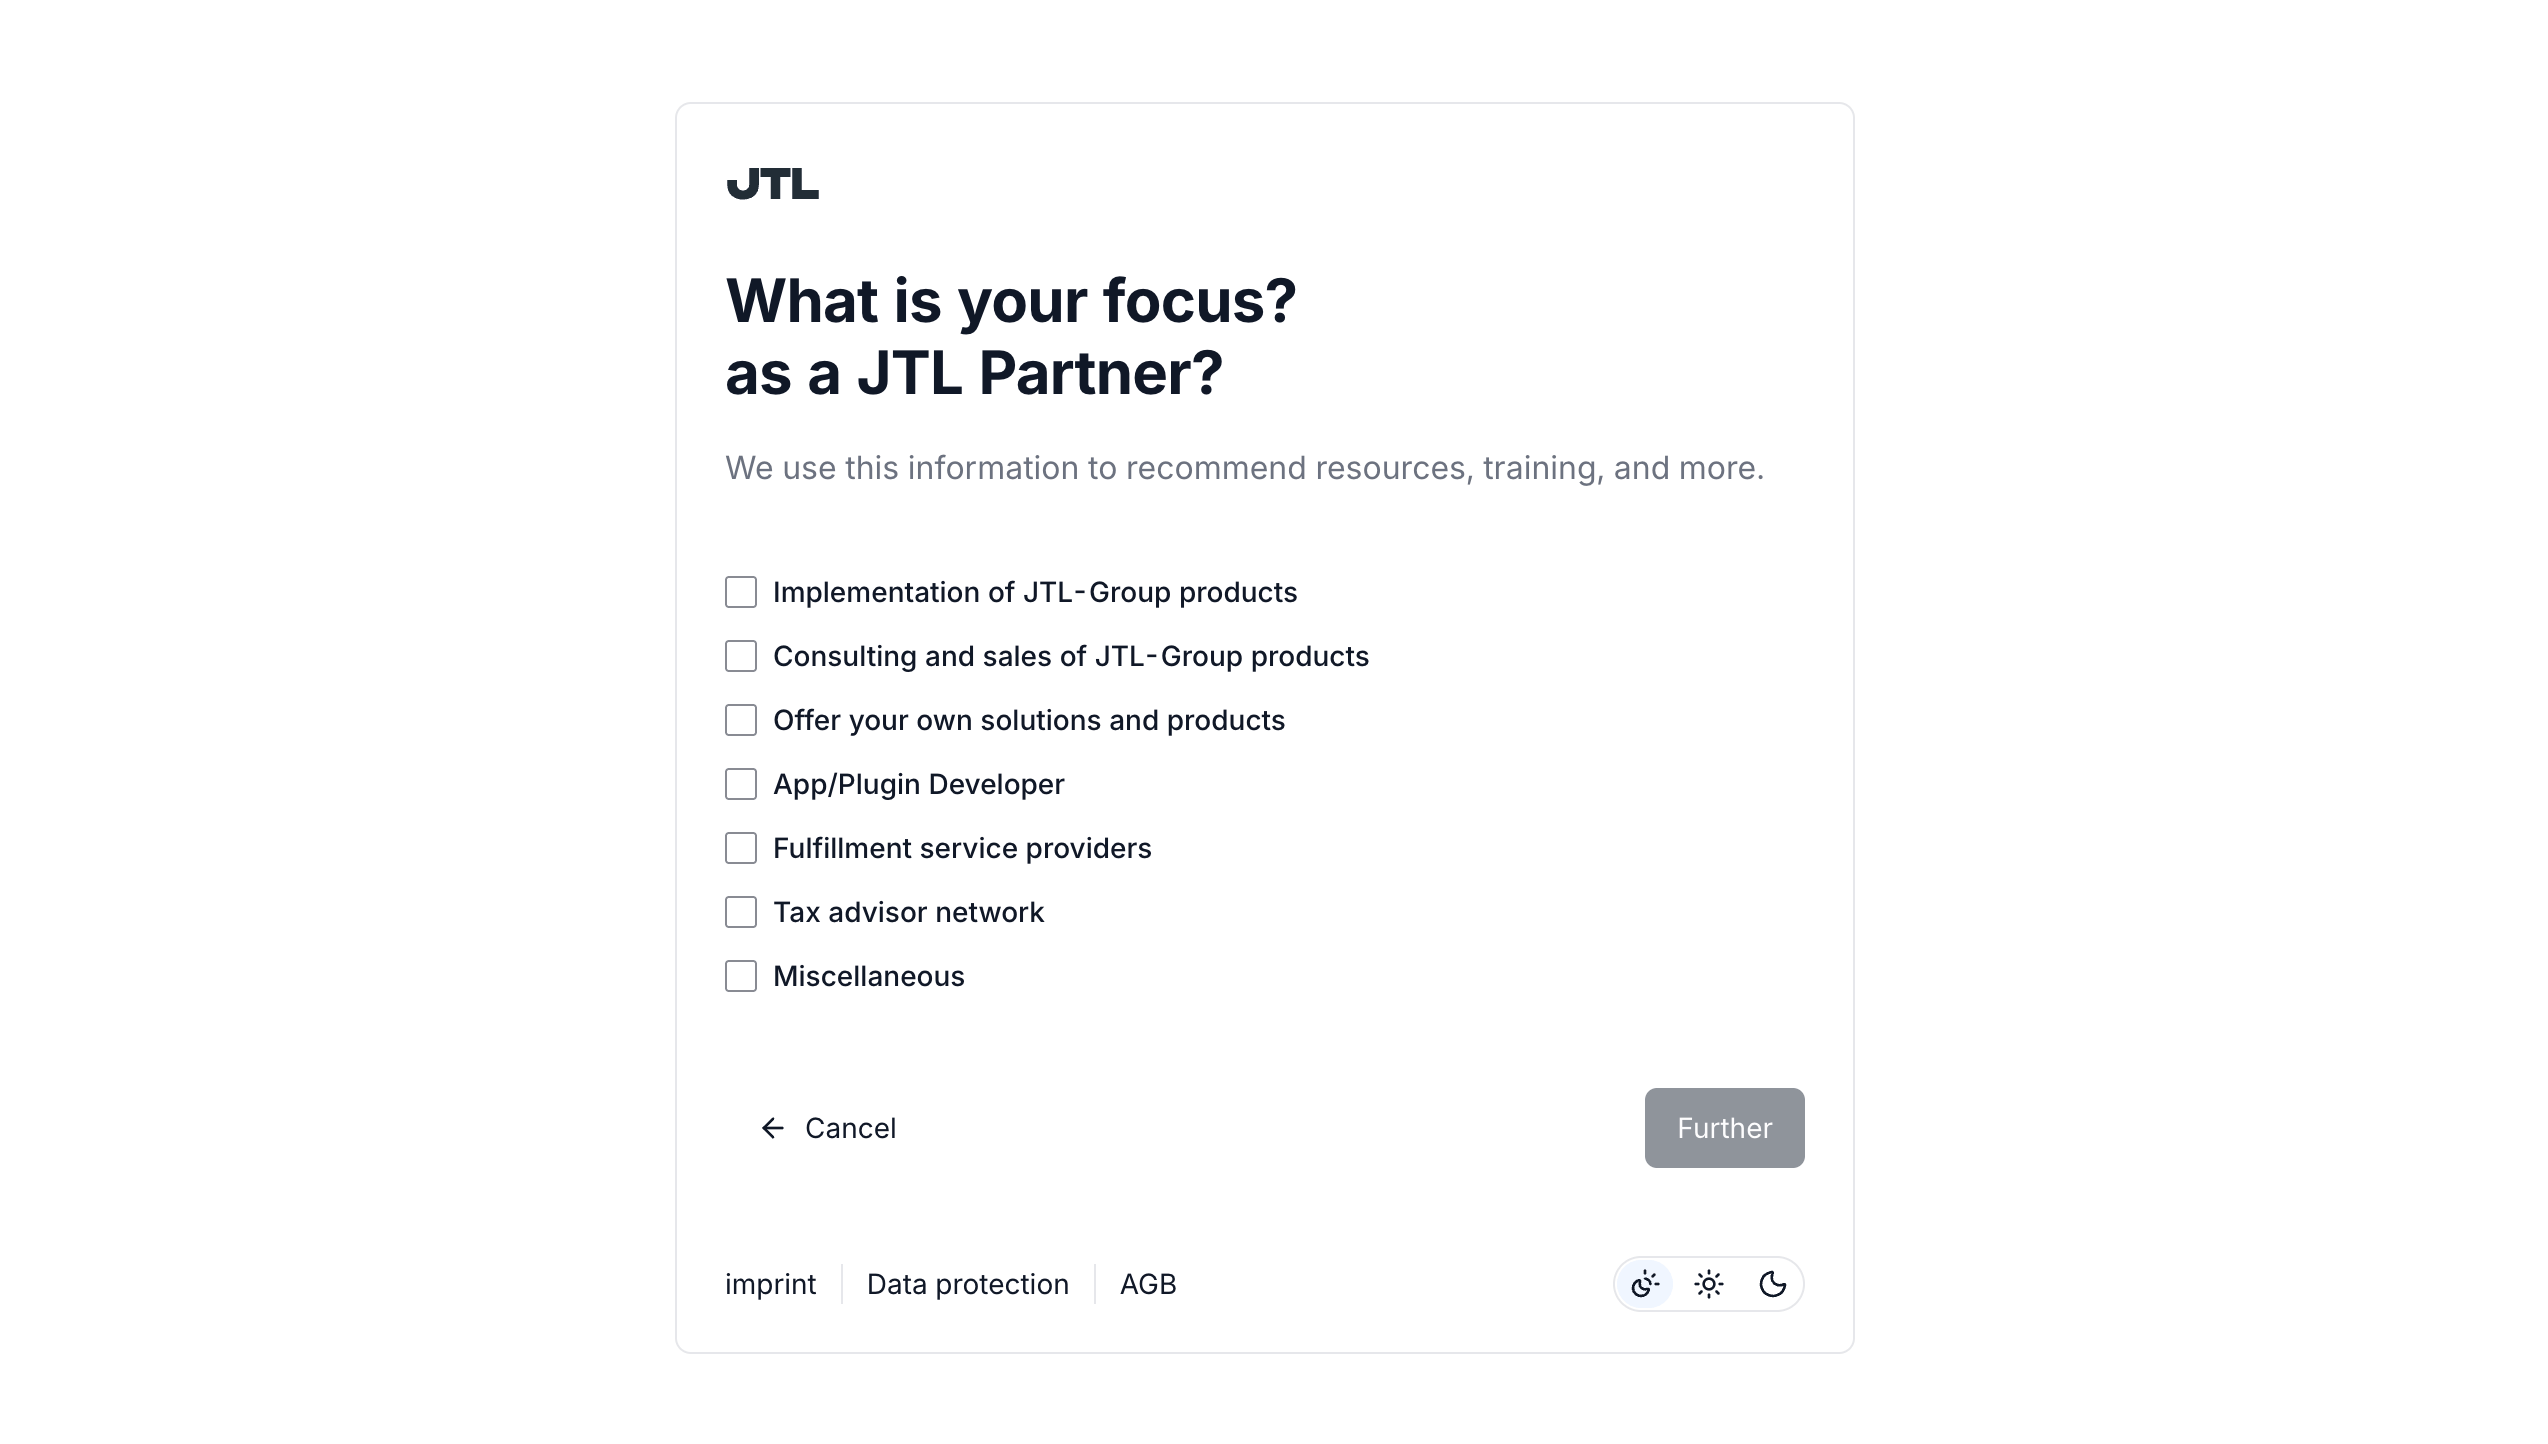
Log in and Create a Customer Center Account
Once you log in with your credentials, choose one of the following:
- New to JTL: Click Create organization and fill in the required details if you don’t have an existing Customer Center Account.
- Existing JTL customer: Click Link your JTL customer account and log in to your Customer Center Account. Then Authorize JTL Cloud when prompted.
-
Once your organization is created, you’ll see your organization name and custom URL path.
-
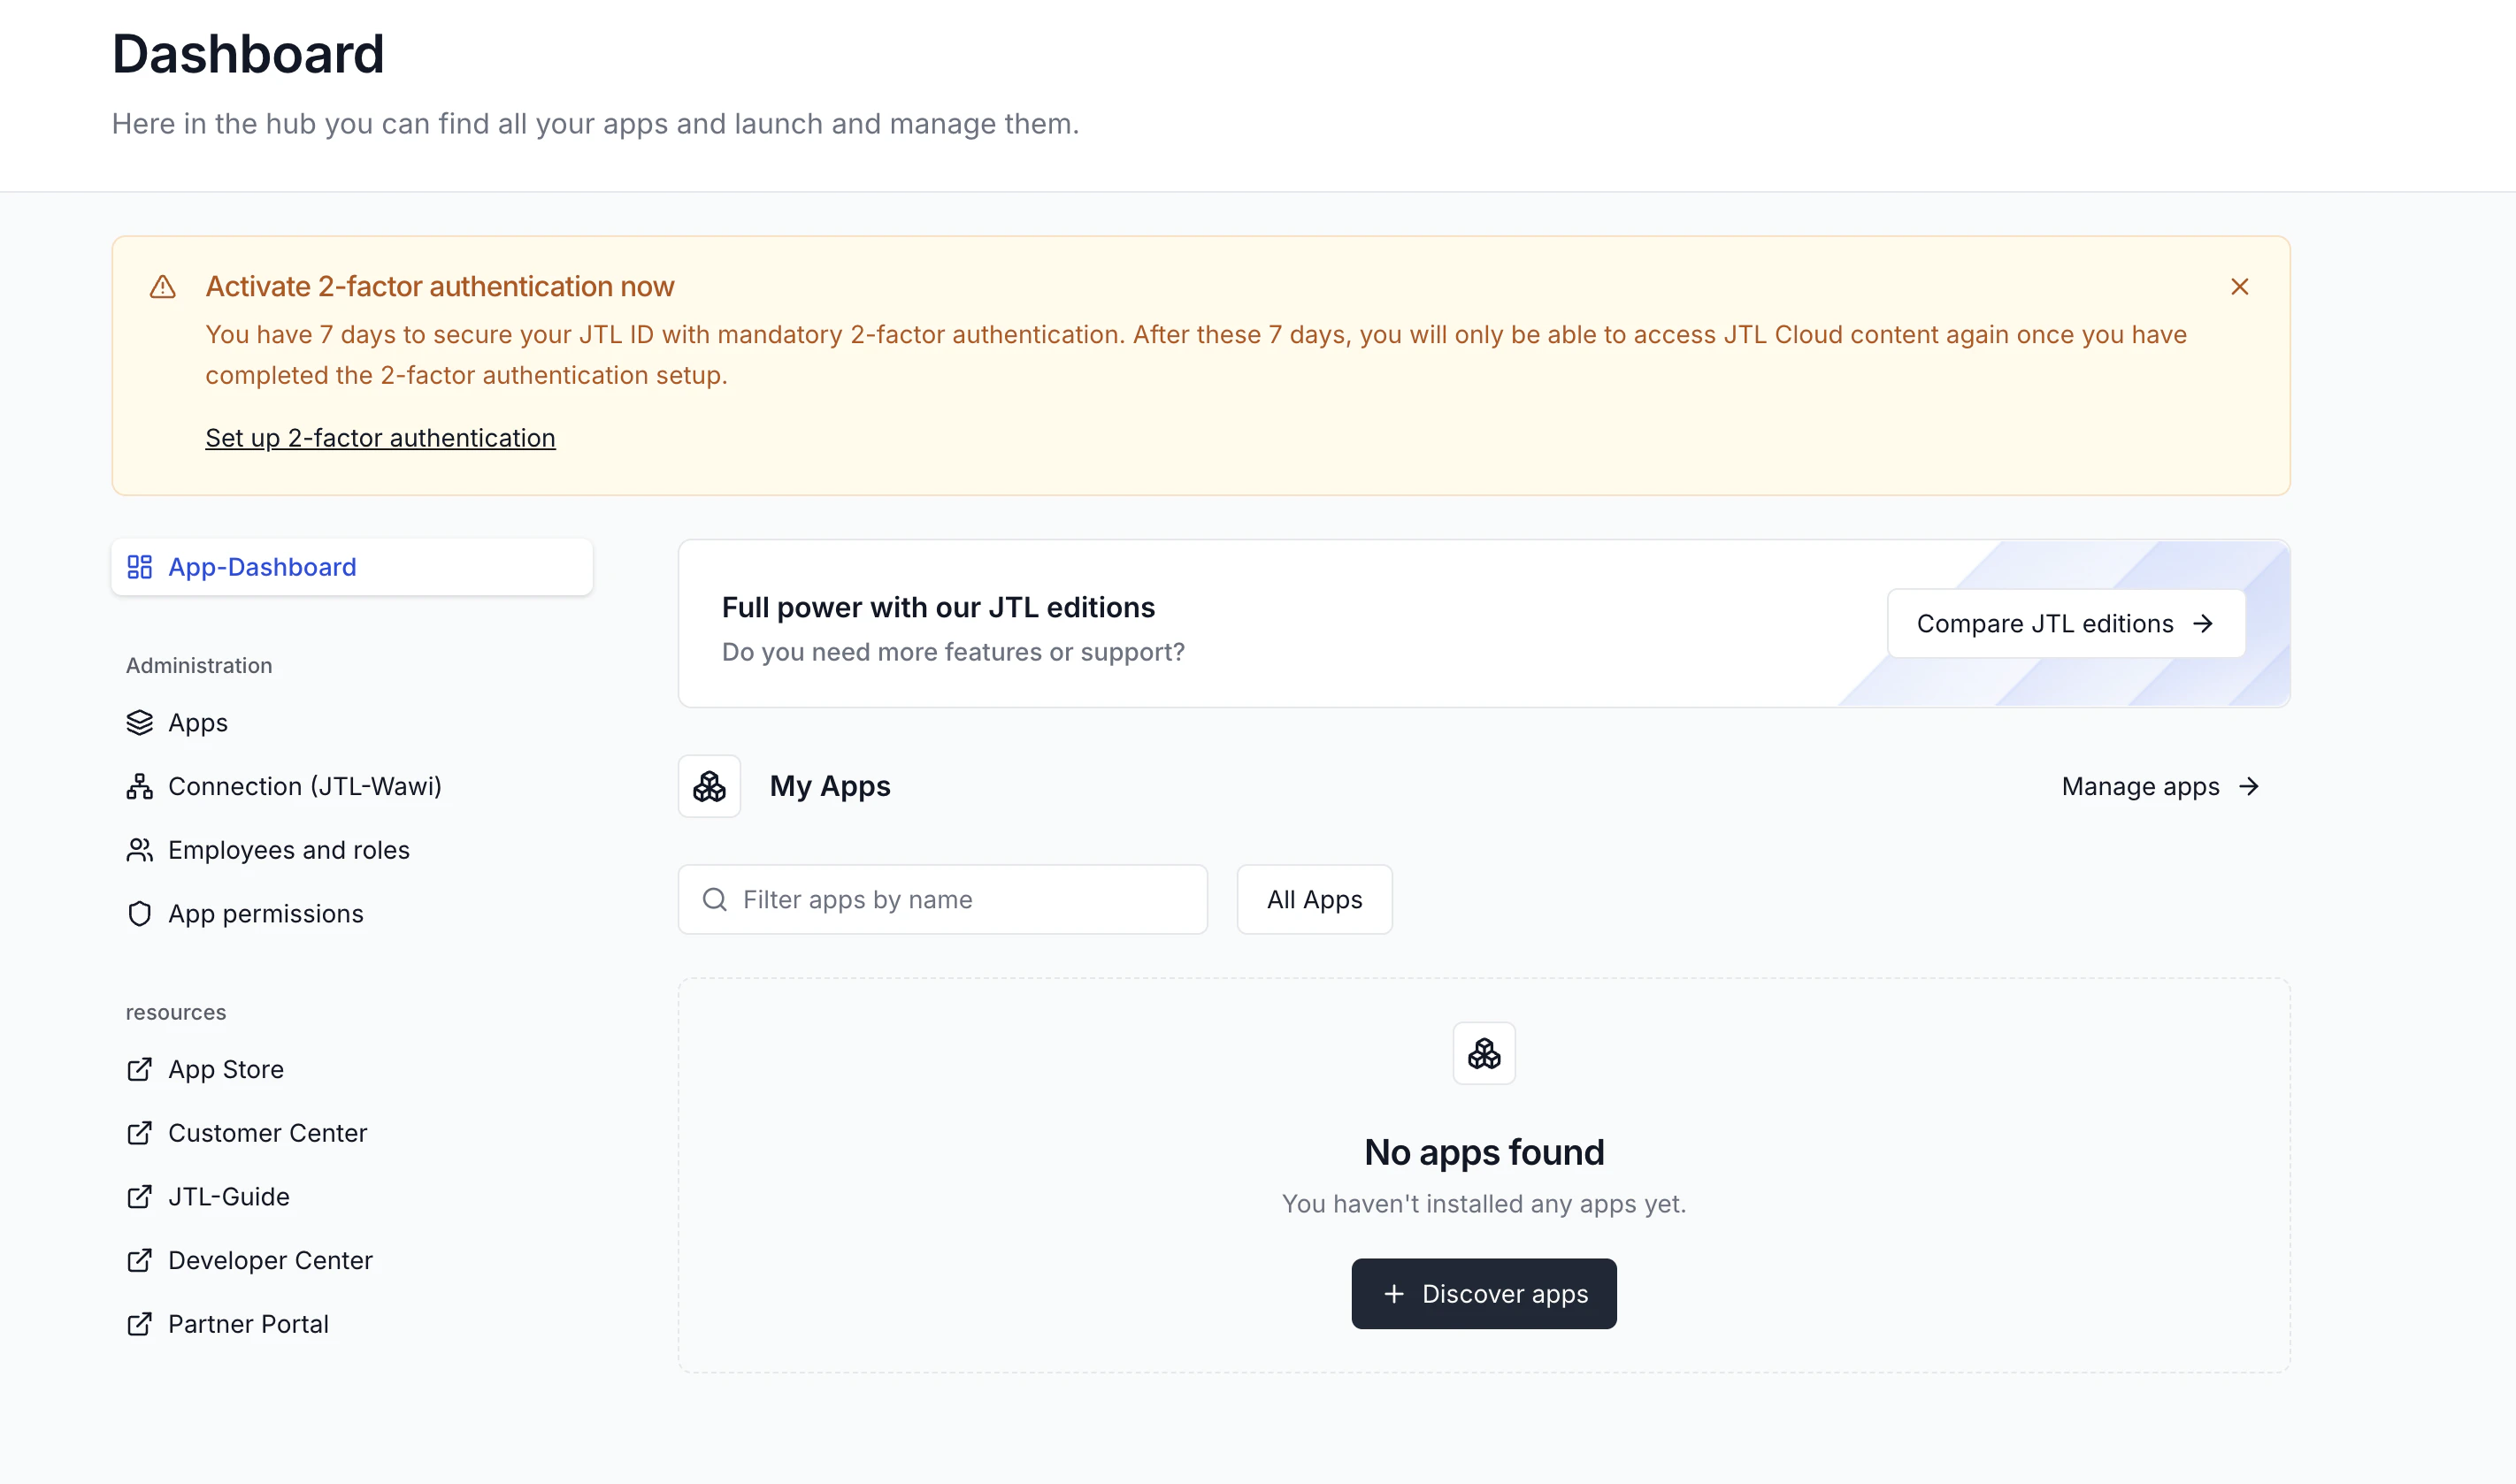
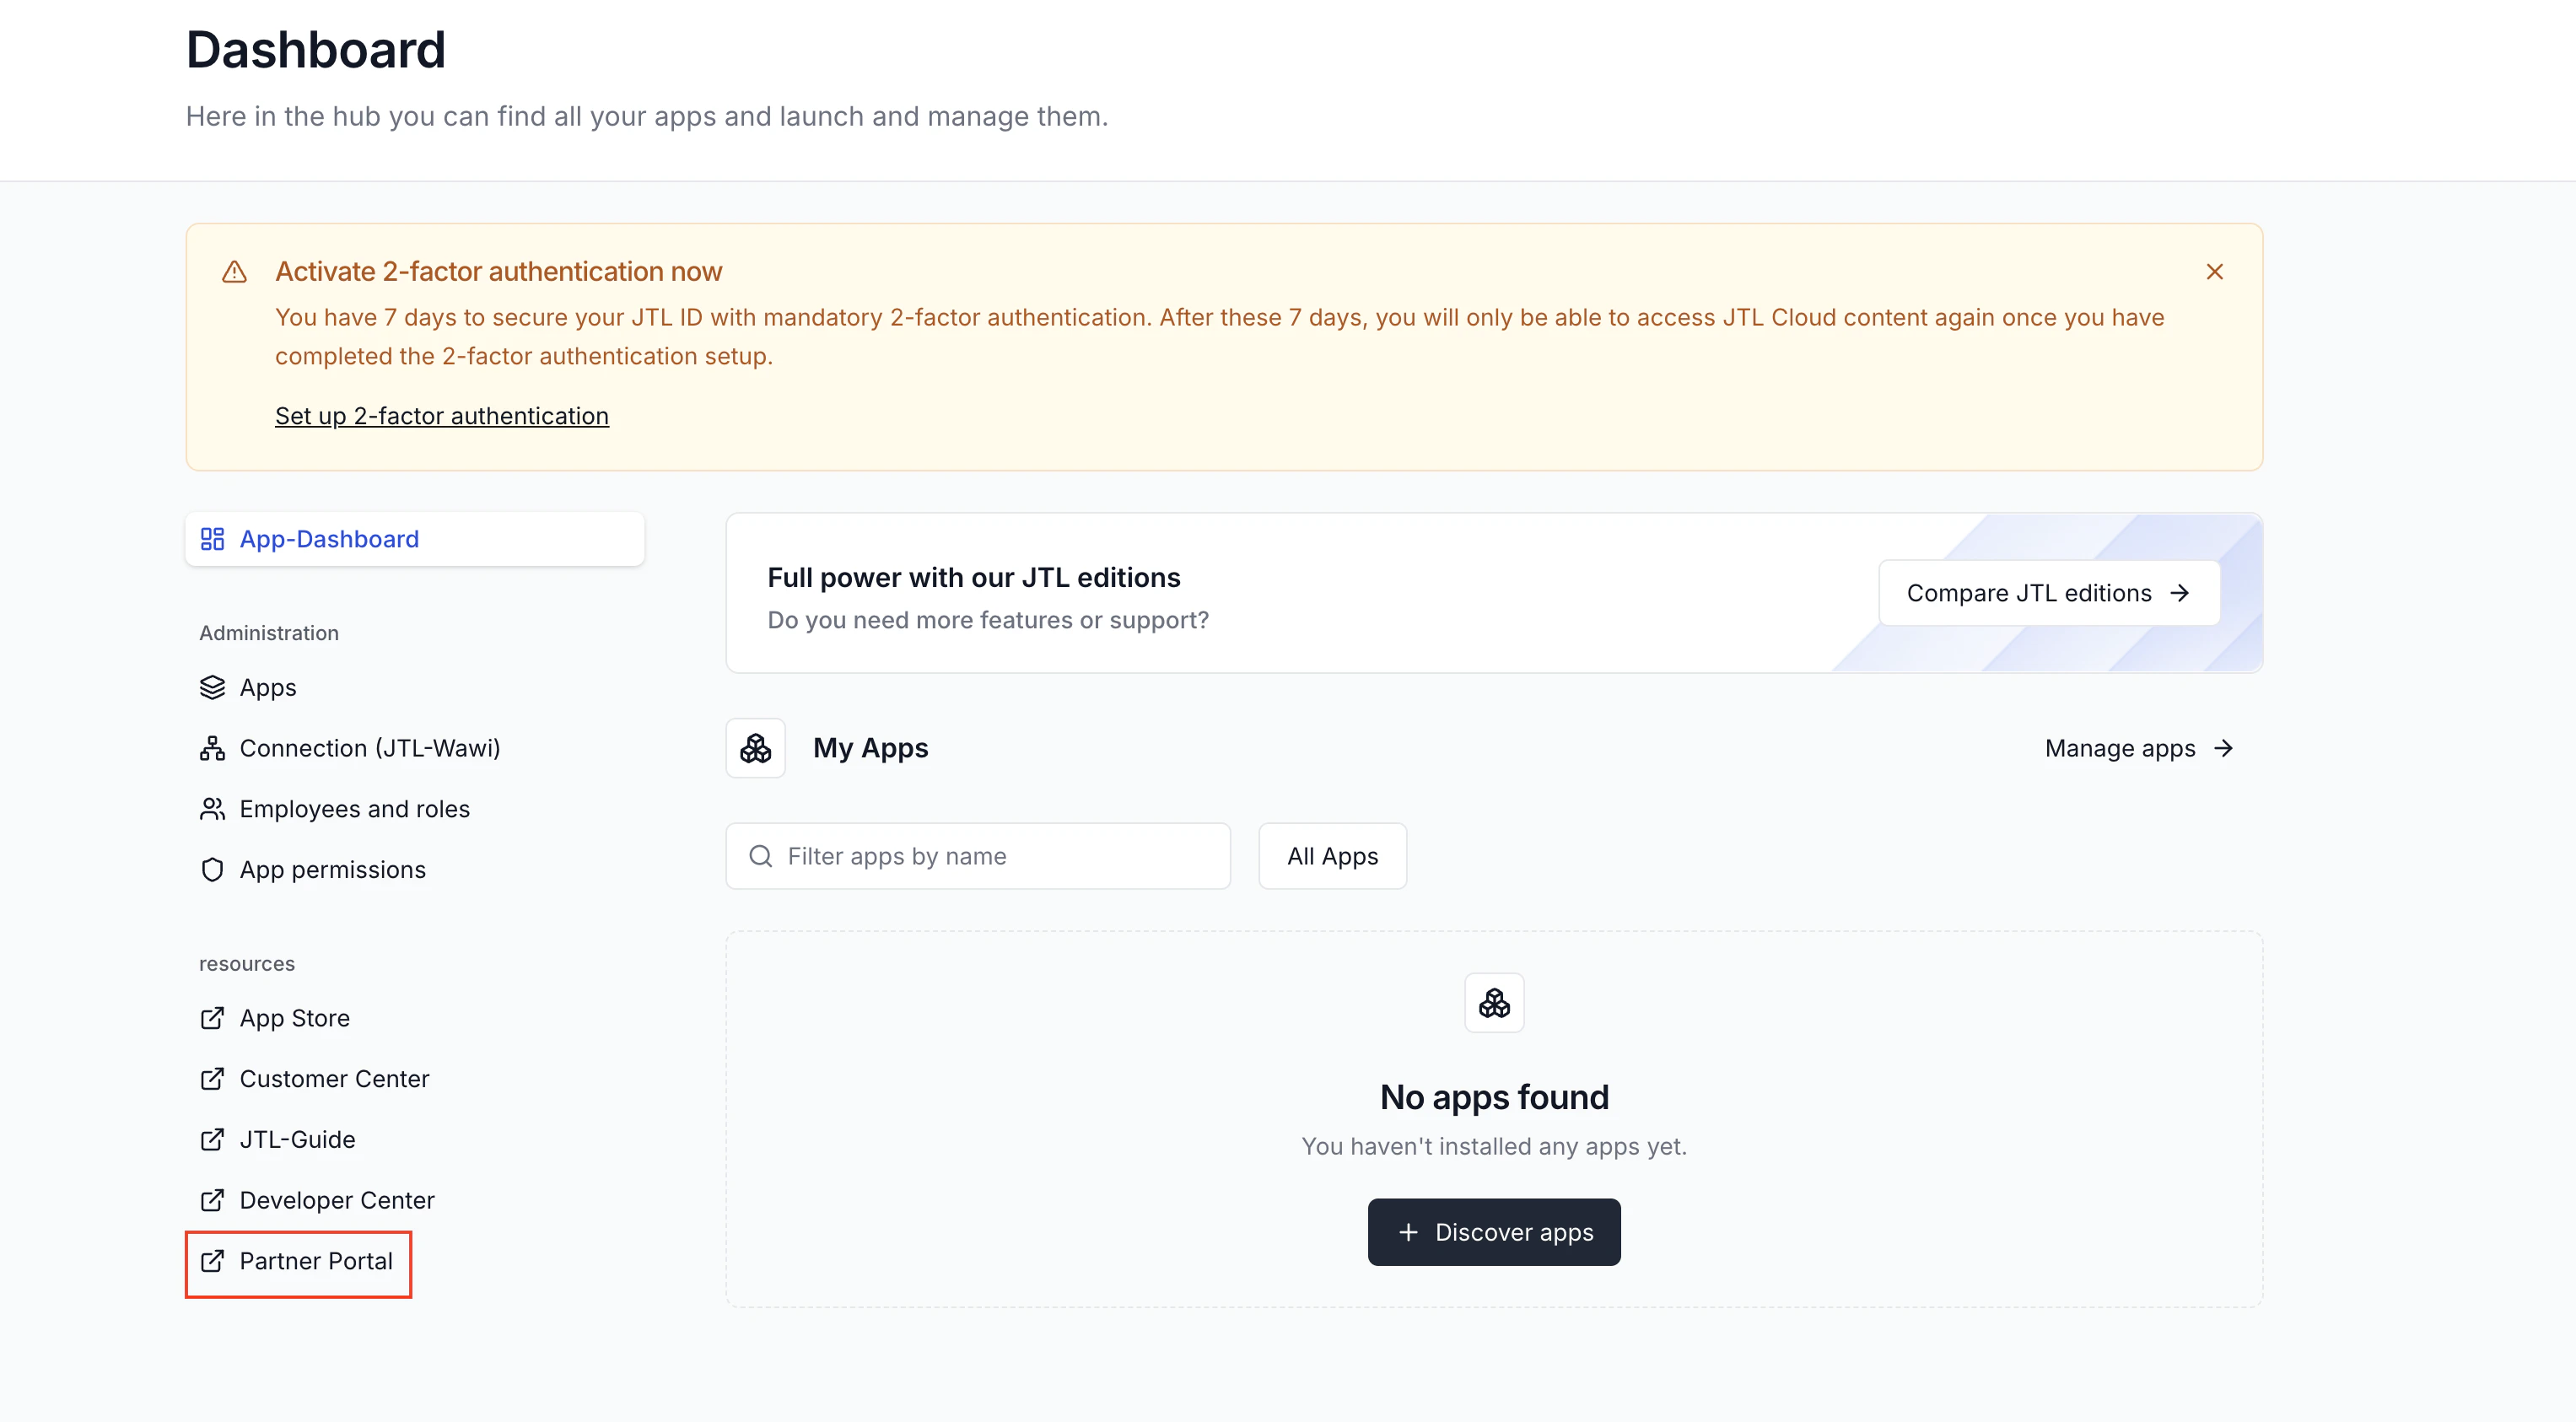
Click Continue to JTL Hub and you’ll be redirected to JTL Hub dashboard.
-
On your JTL Hub dashboard, click the Partner Portal link.
-
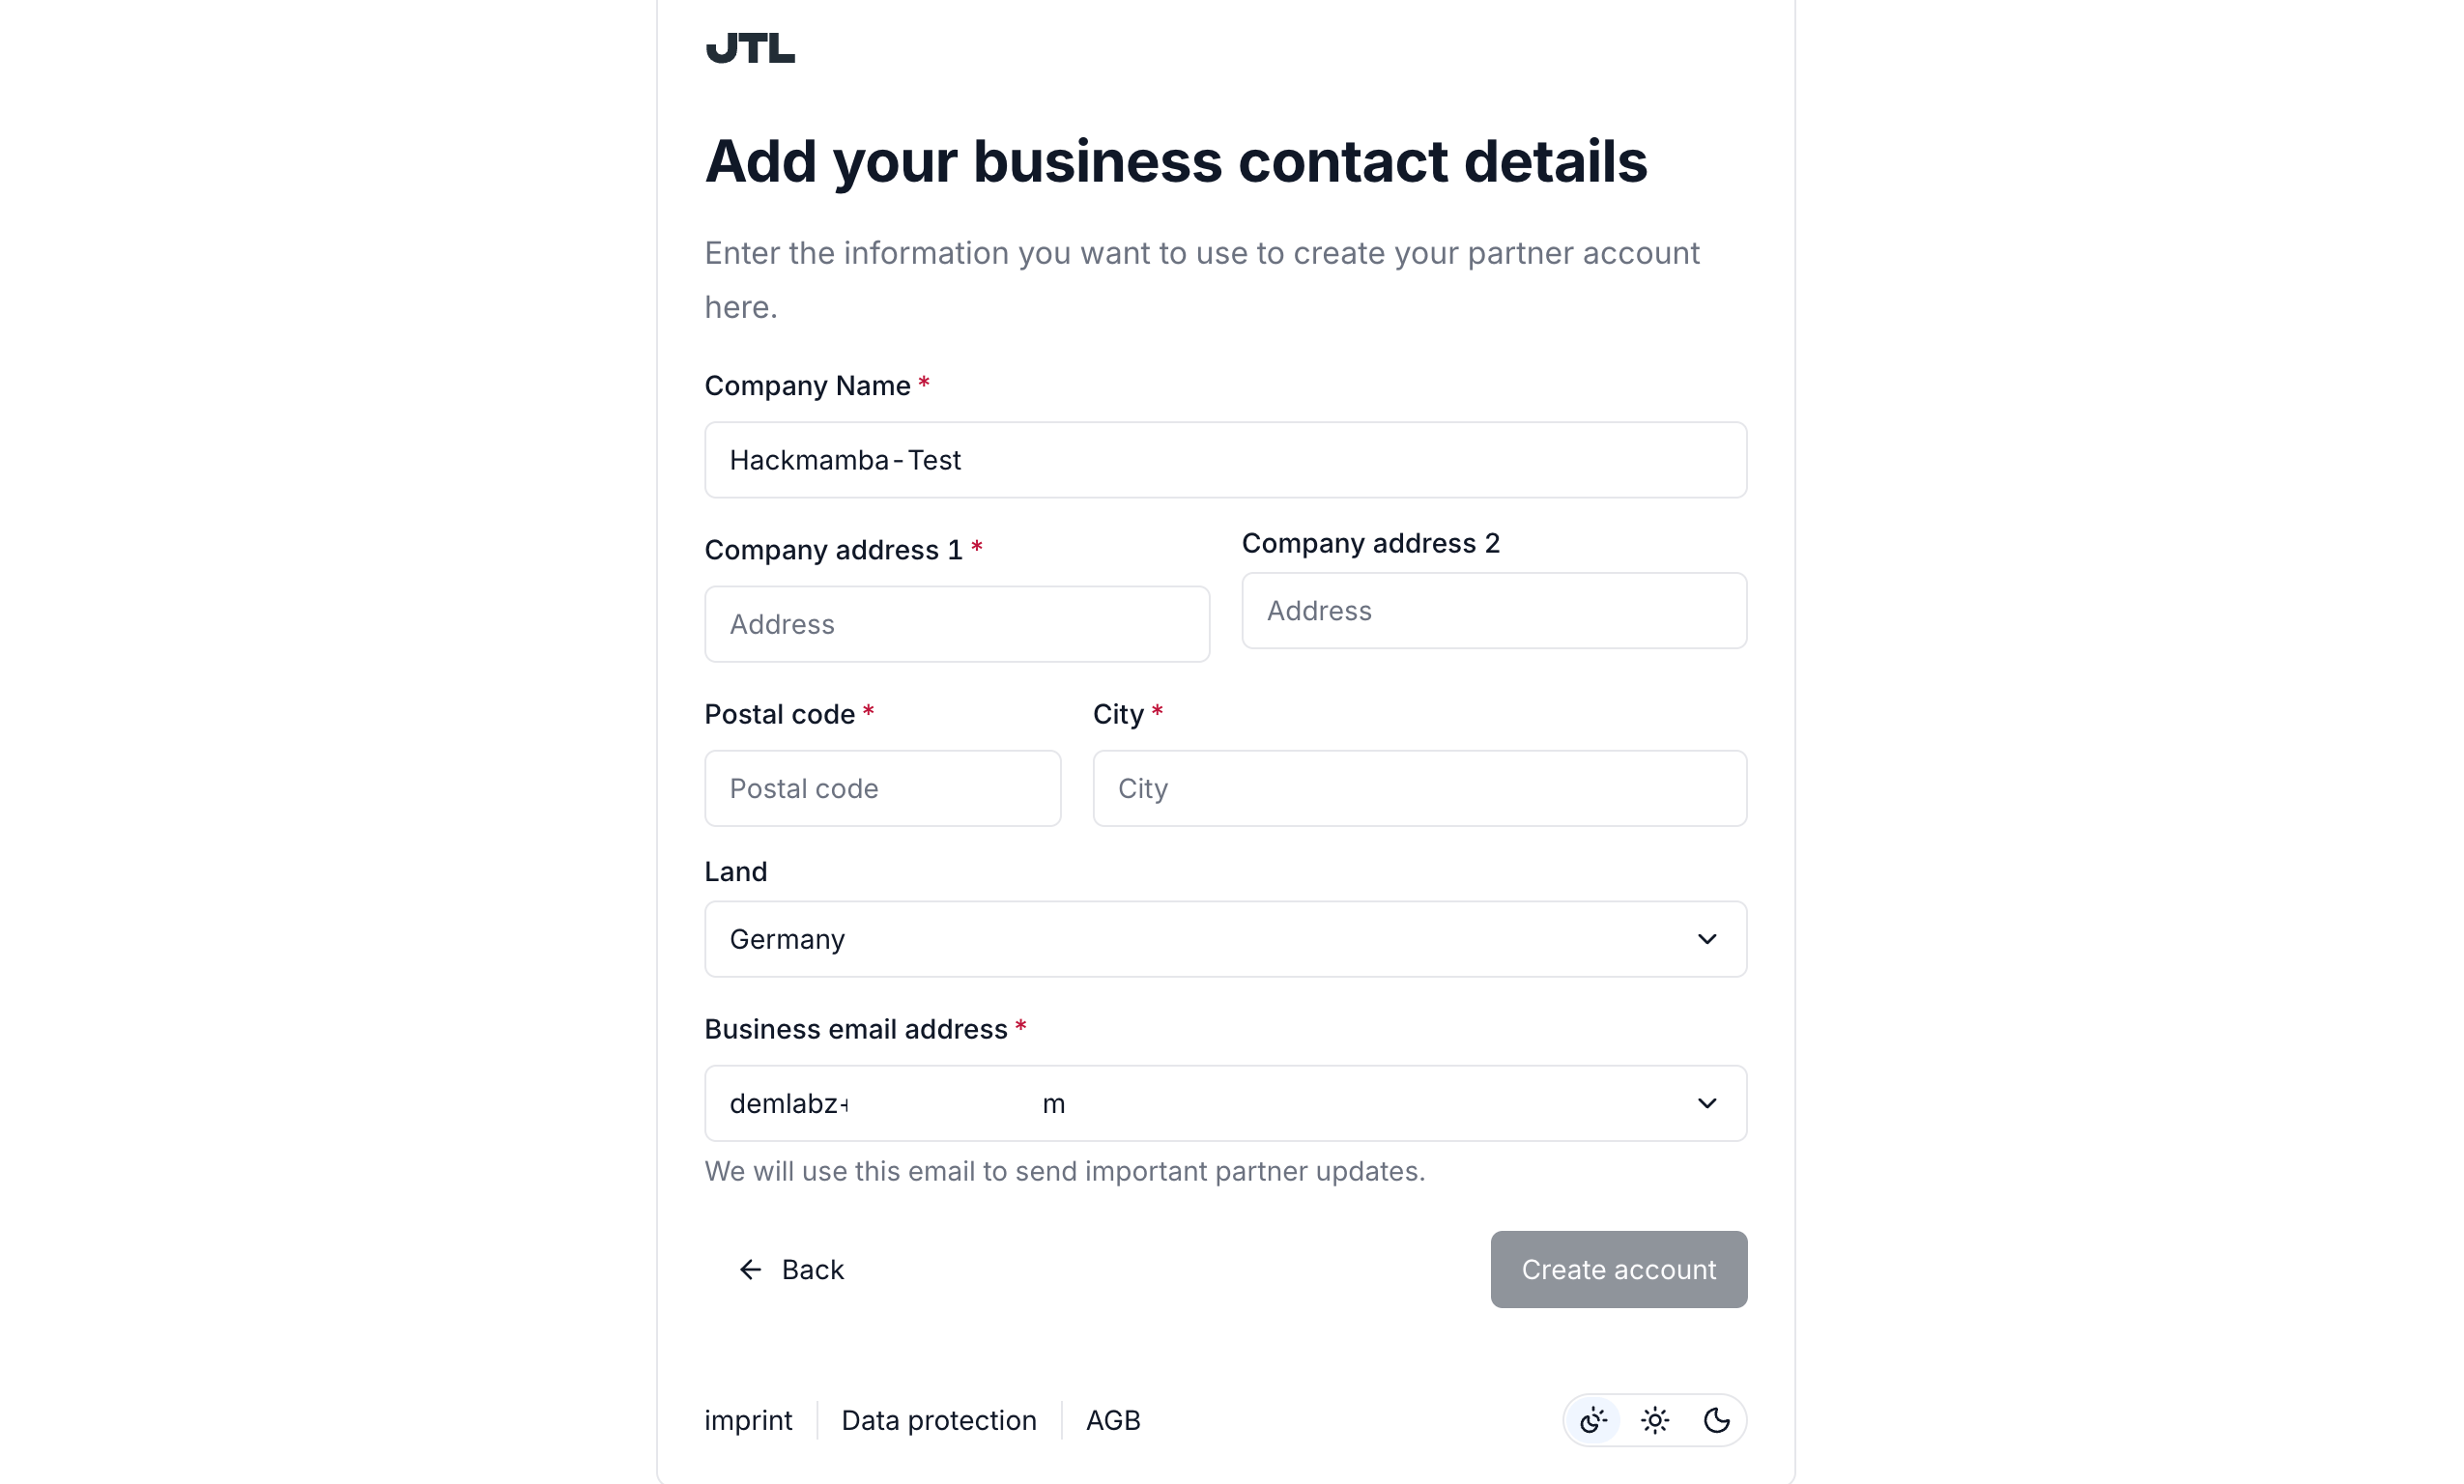
Enter your business contact details and Create account.
Step 2: Connect to JTL-Wawi
The final step is to connect your JTL Cloud environment to JTL-Wawi. Your app uses this connection to read and write merchant data.1
Initiate connection from JTL-Wawi
Log in to your JTL-Wawi instance.In the Admin menu, click JTL Cloud, then click Connect.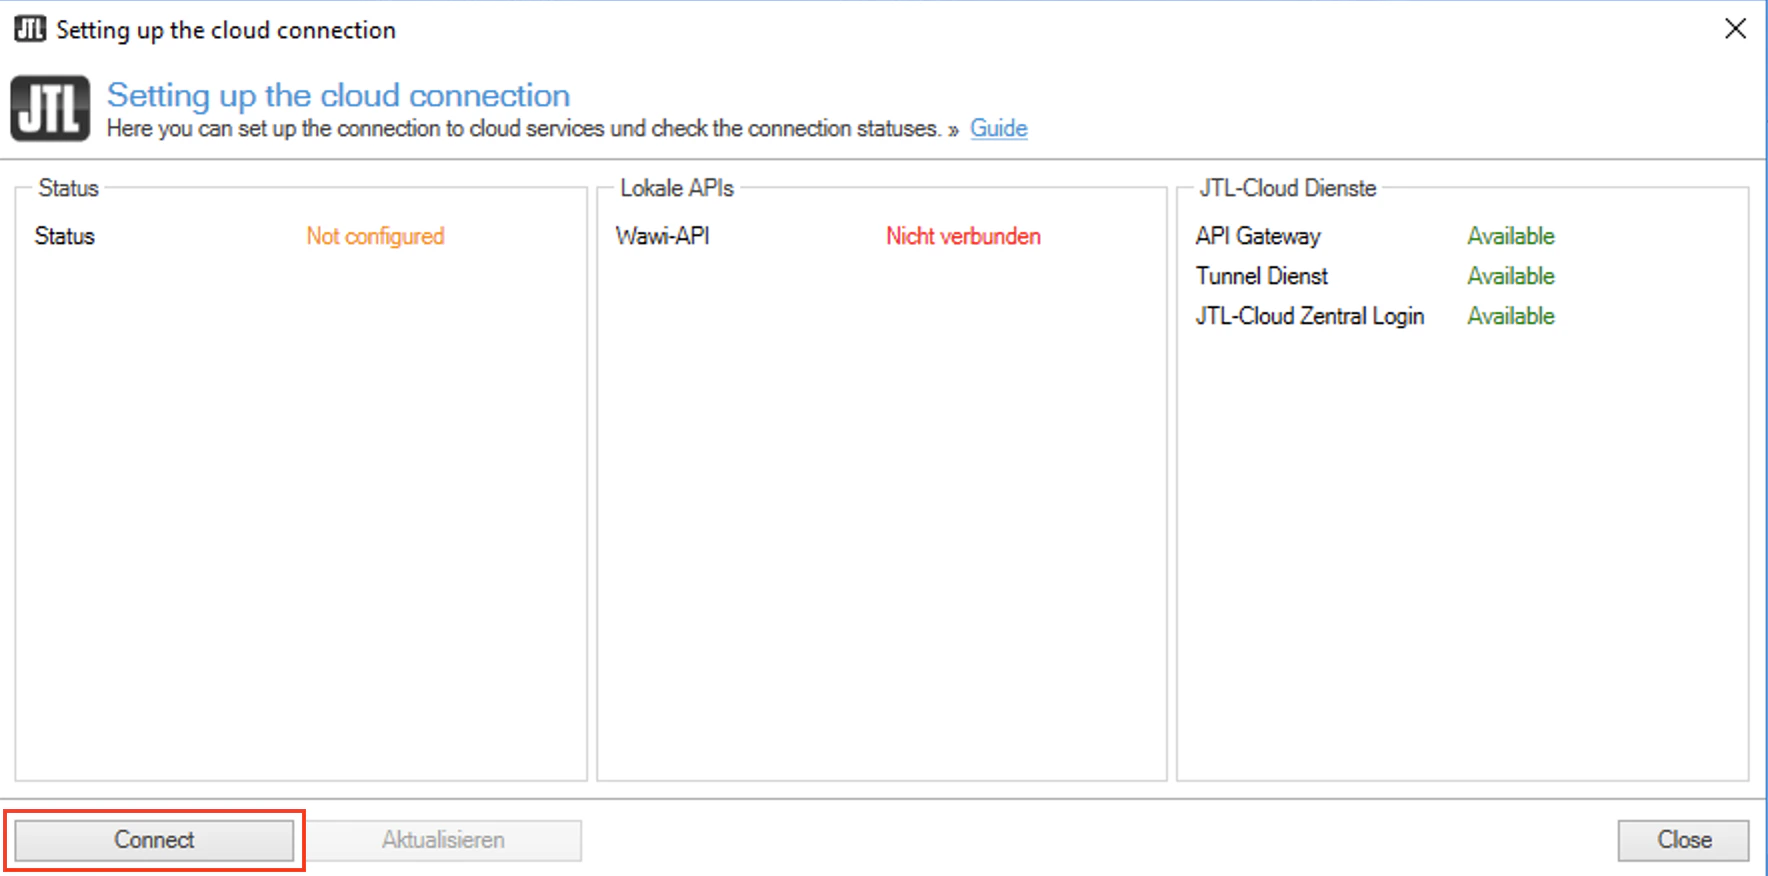
2
Log in to JTL Cloud
Log in using the JTL ID you created in Step 1.Once authentication is successful, close the browser tab and return to your JTL-Wawi instance.
3
Confirm connection status
Back in JTL-Wawi, you’ll see a Connected status, indicating the pairing was successful.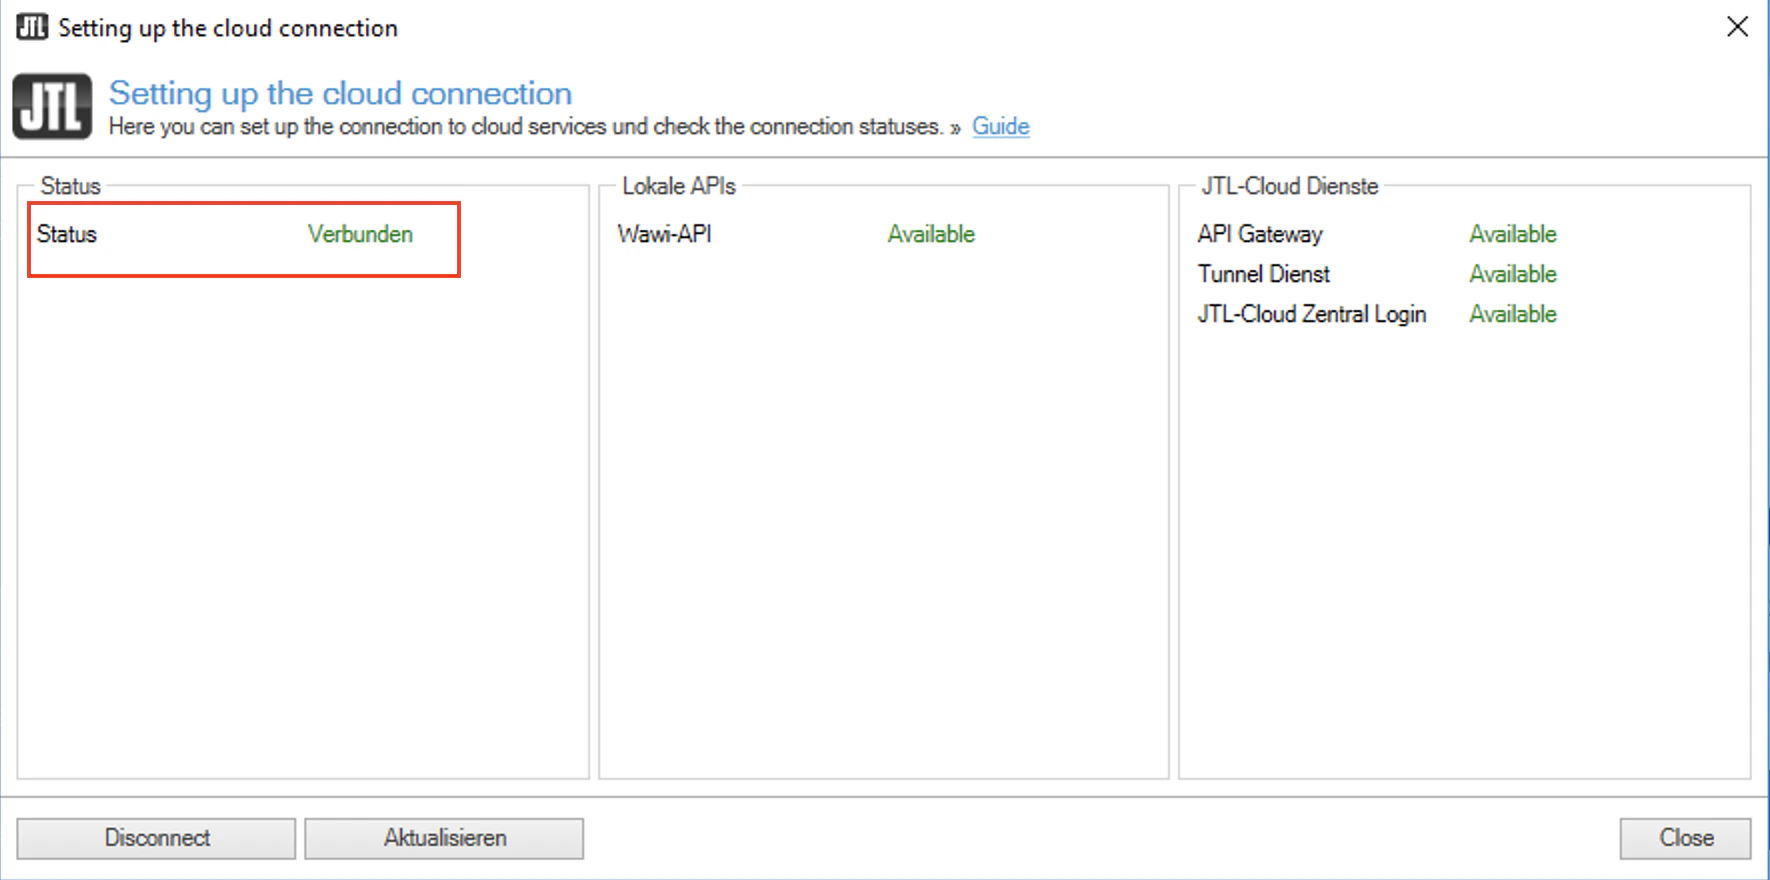
4
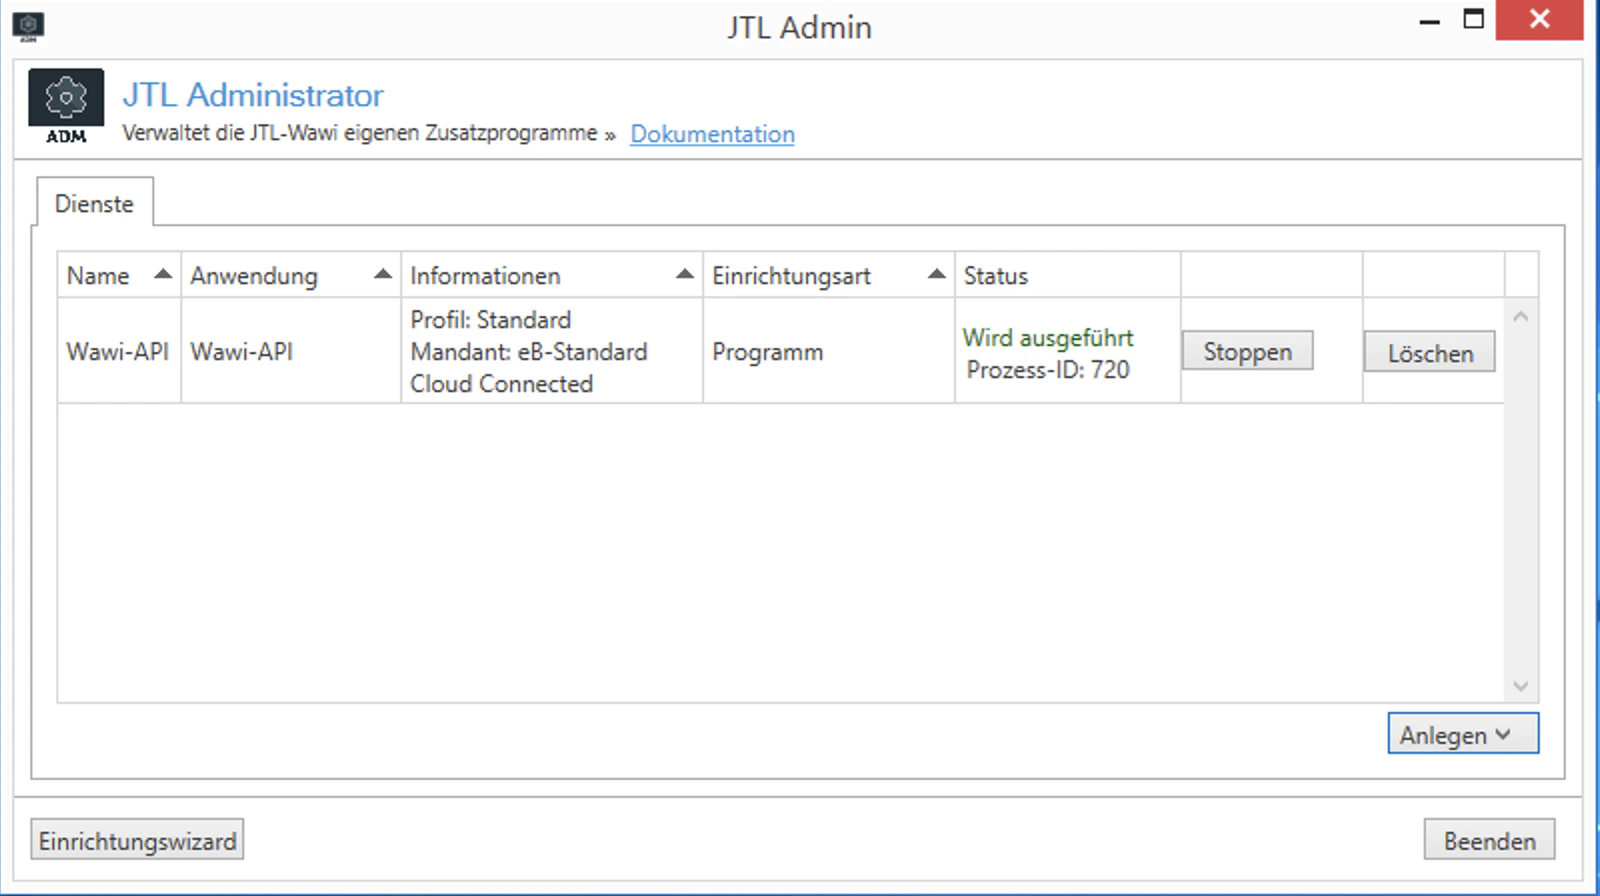
Start the Wawi API
Pairing JTL-Wawi with JTL Cloud is not sufficient on its own. You must also configure and start the Wawi API so your app can access and sync data.Open the JTL Administrator to start the Wawi API.Create a new entry by selecting Wawi-API.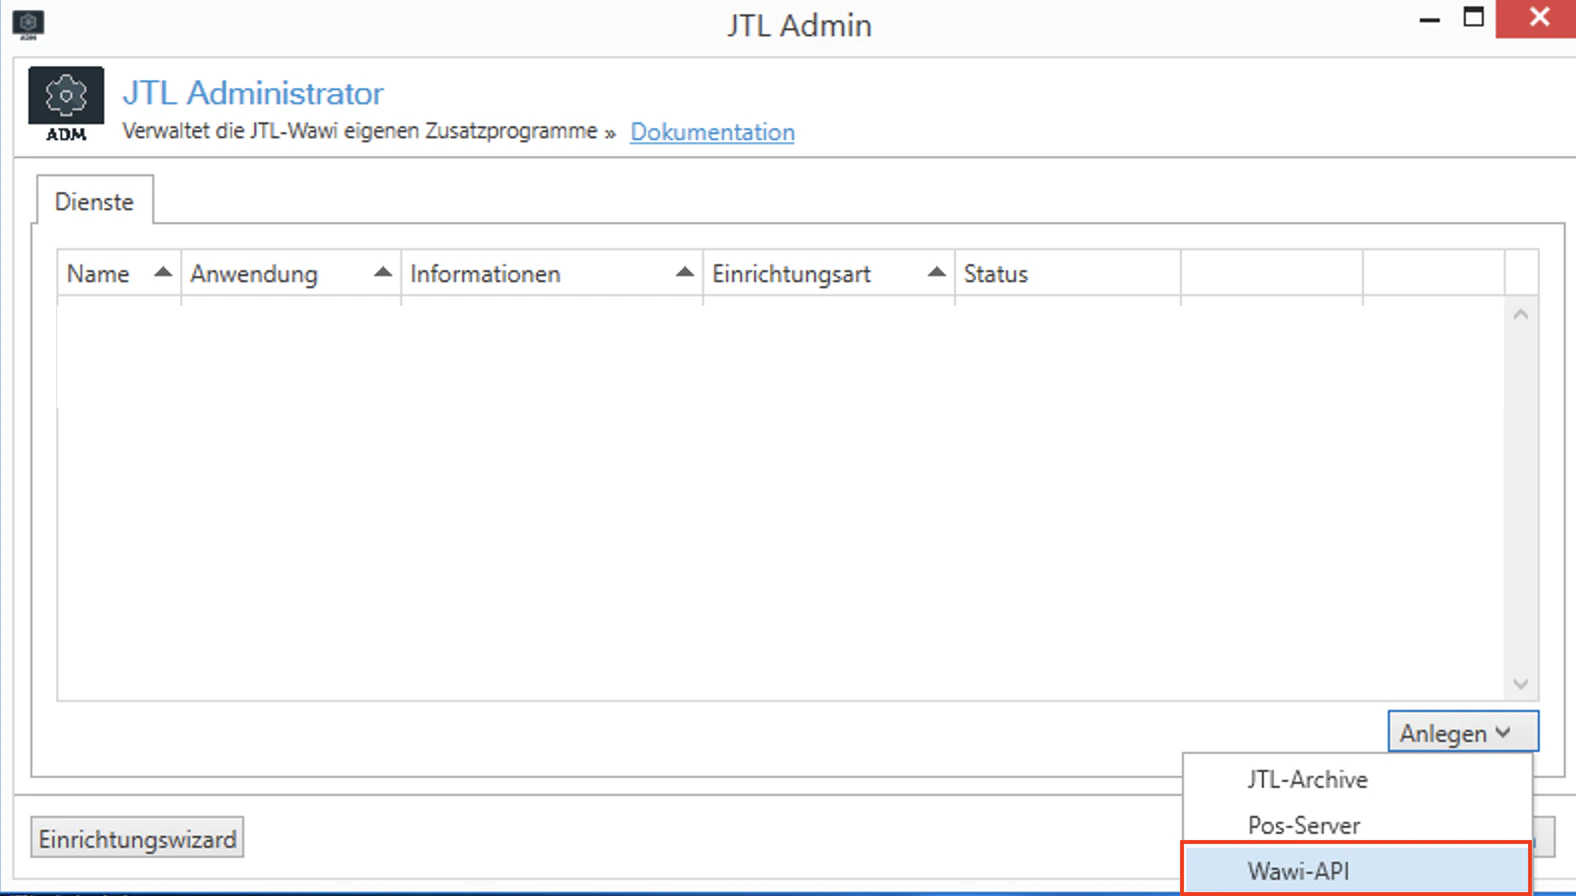

JTL creates a desktop shortcut for the JTL Administrator after installation.
For older versions of JTL-Wawi, you can find it in the installation folder.
For older versions of JTL-Wawi, you can find it in the installation folder.
5
Verify in JTL Hub
Navigate to the Connection • JTL-Wawi menu in JTL Hub to see your connected Wawi instance.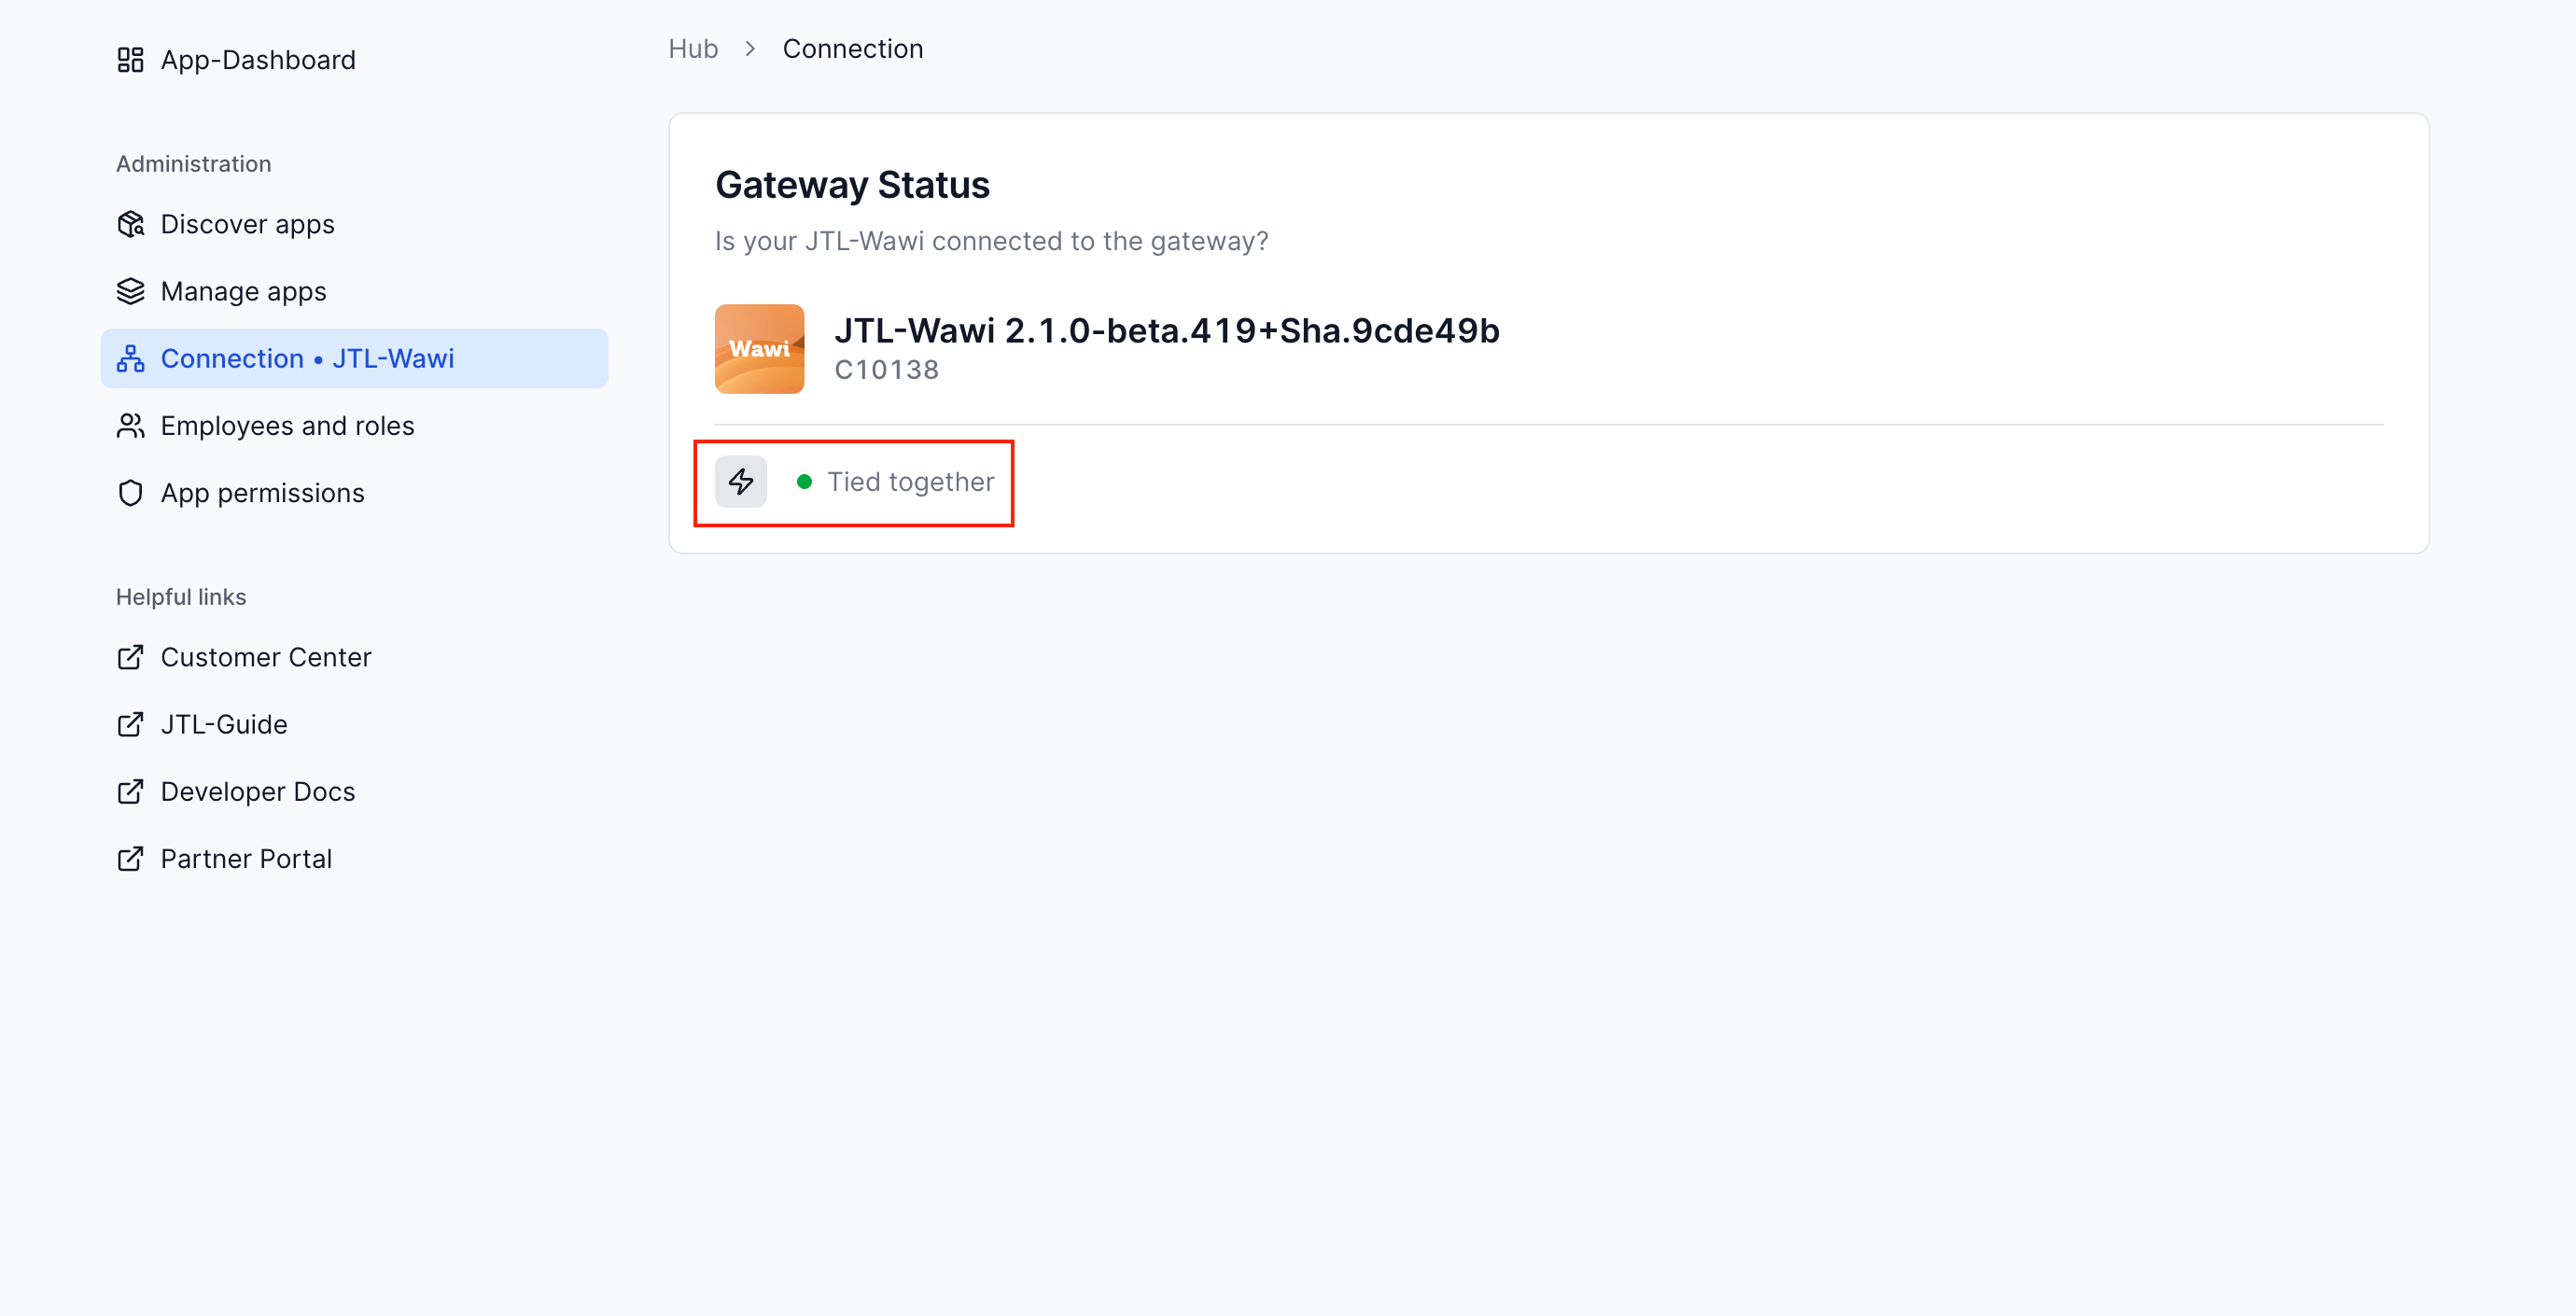
What’s Next?
Quickstart: From Template
Start from a template and get a Cloud App running in minutes. Recommended for most developers.
Quickstart: From Scratch
Build a Cloud App step by step to understand how everything fits together.
Need help? If you run into issues during account setup, reach out via the support channel.